Need final signoff from your client for choices, upgrades, and overages? There are several ways to get these selections onto a change order:
Add to An Existing Draft Change Order
Directly Through the Selection
THROUGH THE CHANGE ORDER
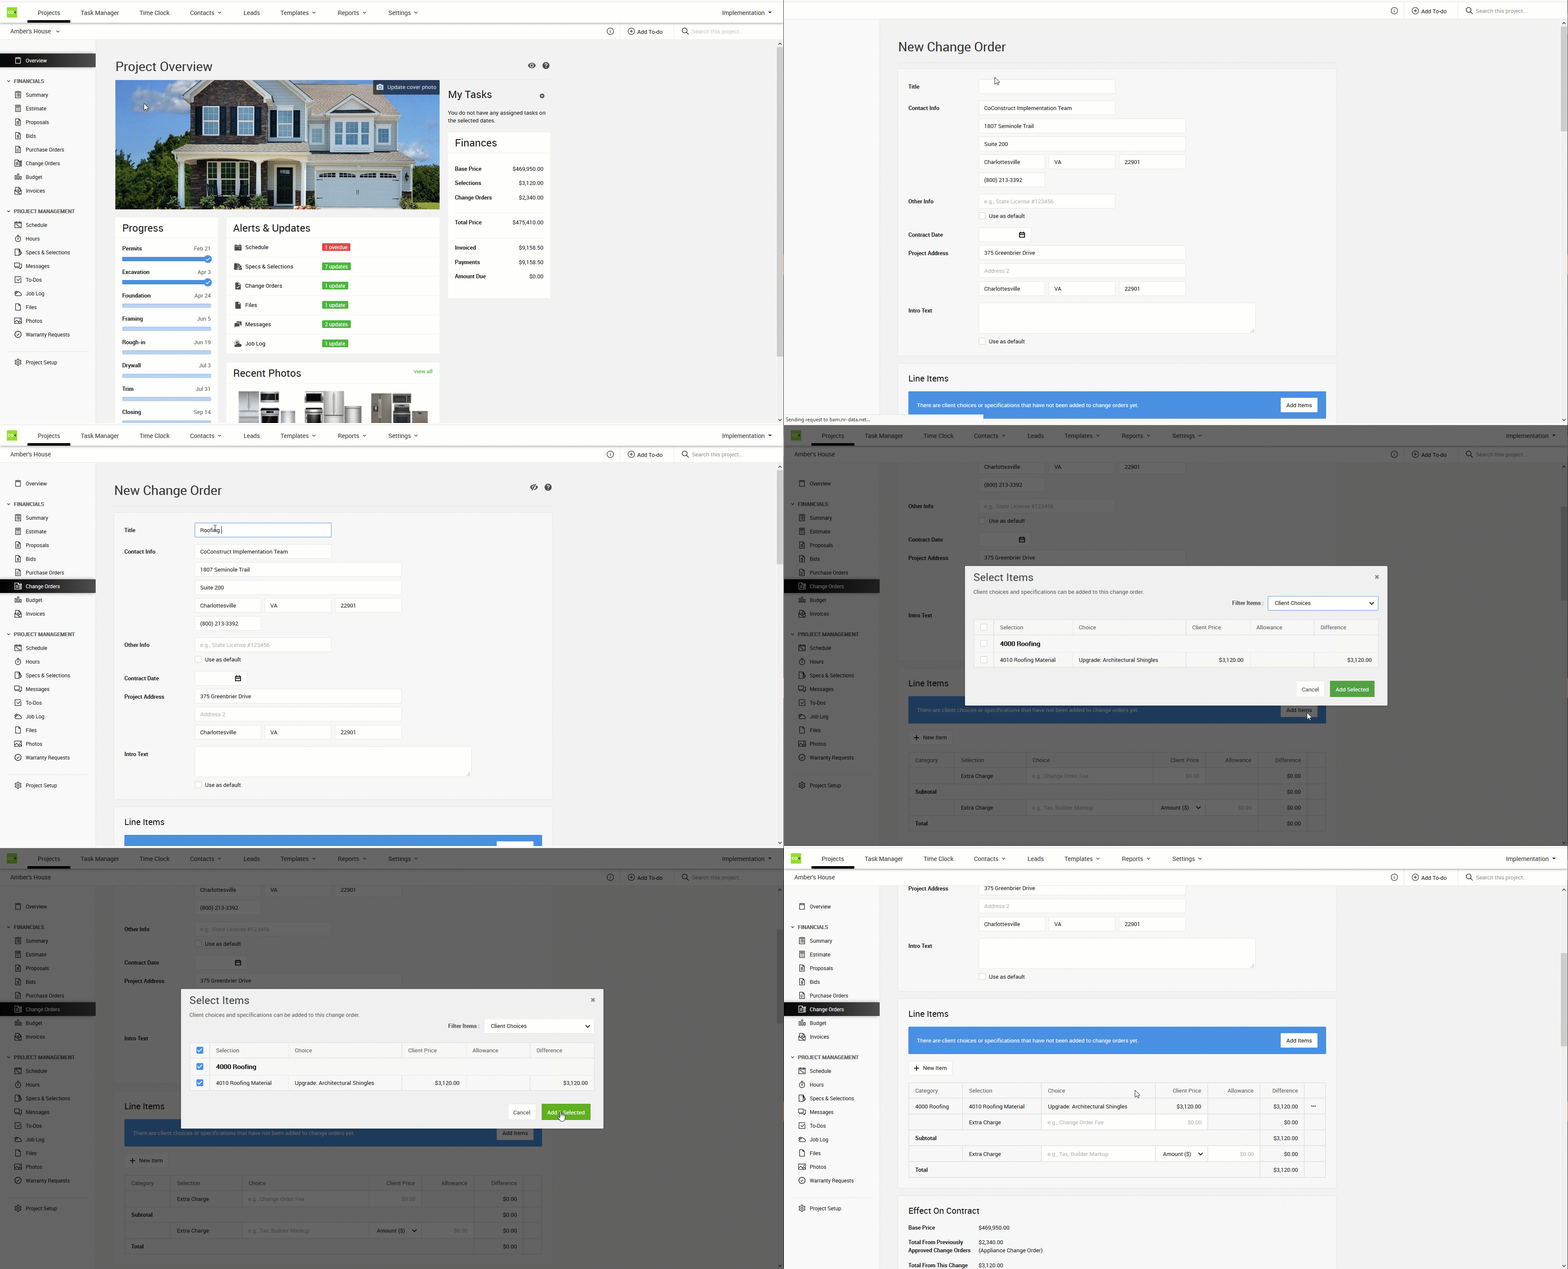
Create a new change order by selecting “Change Orders” from the Financials menu then selecting the “+ New Change Order” button to get started. Once on the change order, use the Line Items section to detail out what items and costs need signoff. Use the big blue banner to “Add Items” then check the box next to the client choices you’d like to add to the change order.

Learn more: Setting up a Change Order - Start to Finish
ADD TO AN EXISTING DRAFT CHANGE ORDER
If you already have a draft document started, head to the “Change Orders” page of the project then click “View/Edit Change Order.” Use the blue banner in the Line Items section to “Add Items” in addition to any other changes you might have drafted.
DIRECTLY THROUGH THE SELECTION
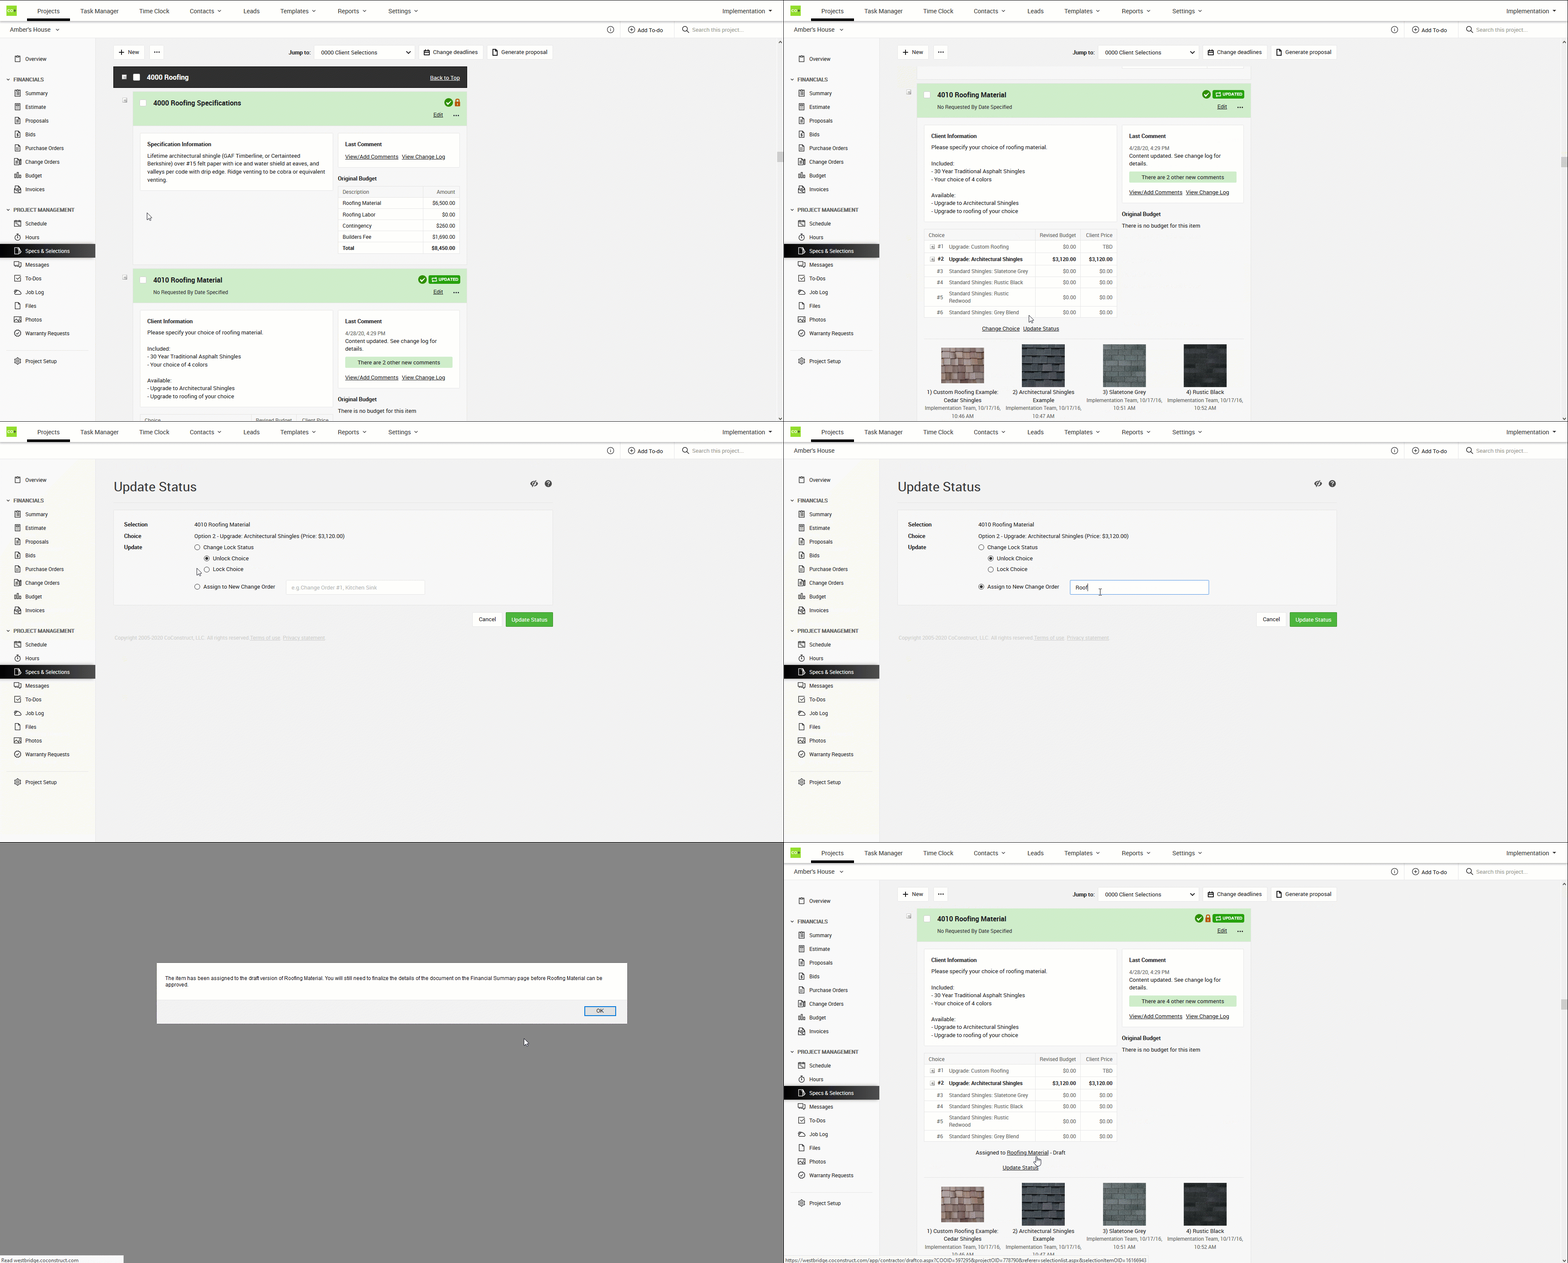
While you are on the Specs & Selections page, any client selected item can be added directly to a change order document. Find the selection where a choice has been made, then click the “Update Status” link. Use the option “Assign to New Change Order” to get a draft started or “Assign to Existing Draft Change Order” to place that selection directly on a document. Once you “Update Status,” the selection will get added to the change order and offer a link for you to jump right into finishing off the details to get approval.

Quick Instructions:
- Start on the Specs/Selections page
- Find the item where a choice was made
- Click “Update Status”
- Check the bubble for assigning the item to an existing draft change order or to a new change order
- Select “Update Status” once you’ve decided
- The system will tell you the selection was added to a draft. Click “Ok” to proceed.
- Jump to the draft change order by clicking the link on the selection
